How to care for an Alocasia? How often do you need to water an Alocasia? How much light does an Elephant Ear need? What are the main care tips when growing an Alocasia indoors?
If you have recently expanded your plant collection by adding an Alocasia to it, then the above and many more questions might be on your mind. Fret not, this article is exactly for you as in it you will find all the care requirements of an Alocasia.
Caring for an Alocasia indoors is both easy and complicated. The plants from the Alocasia genus are usually not considered beginner-friendly. This is not because the plants require any special care but because Alocasia wants its owner to stay on top of its needs. This complete Alocasia care guide will cover all the things you need to know to help you keep your Elephant Ear happy, healthy, and thriving.
You probably have heard of many different Alocasia species, to name a few: Alocasia Polly, Frydek, Alocasia Dragon Scale, Alocasia Variegata, Wentii… the good news is that they all pretty much have the same care needs, phew!
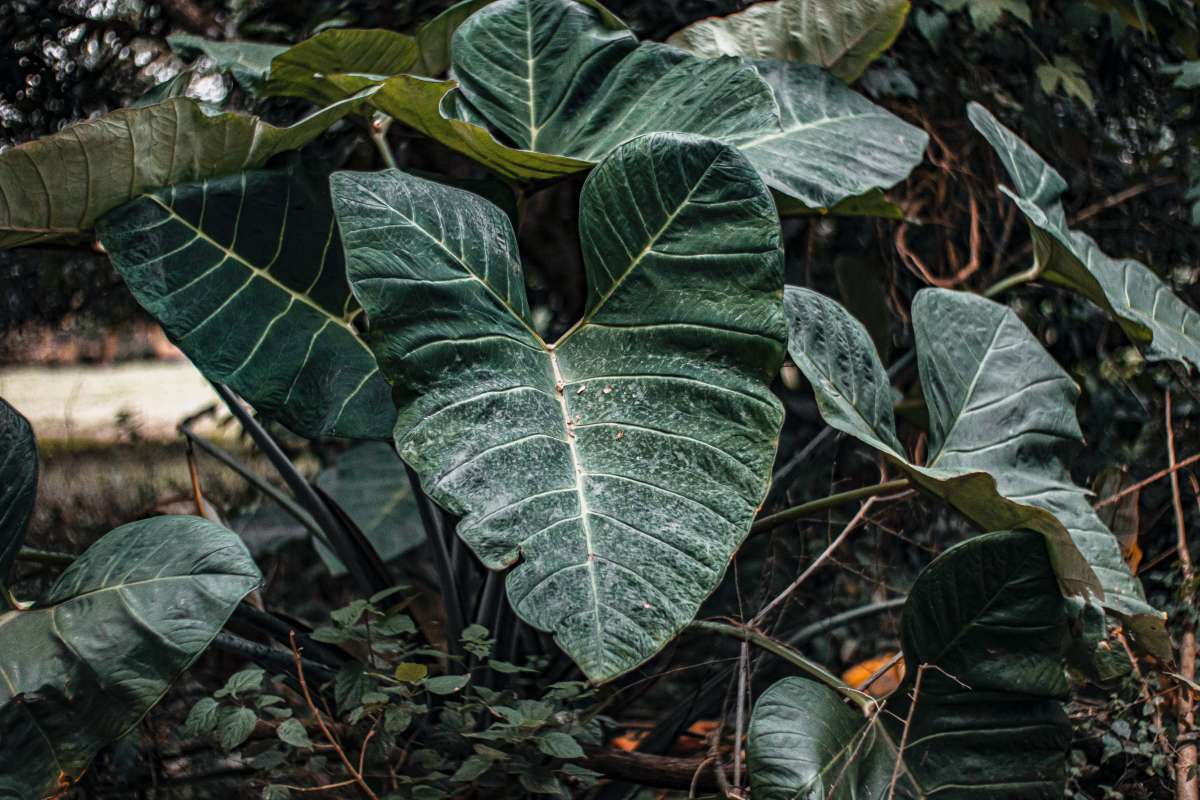
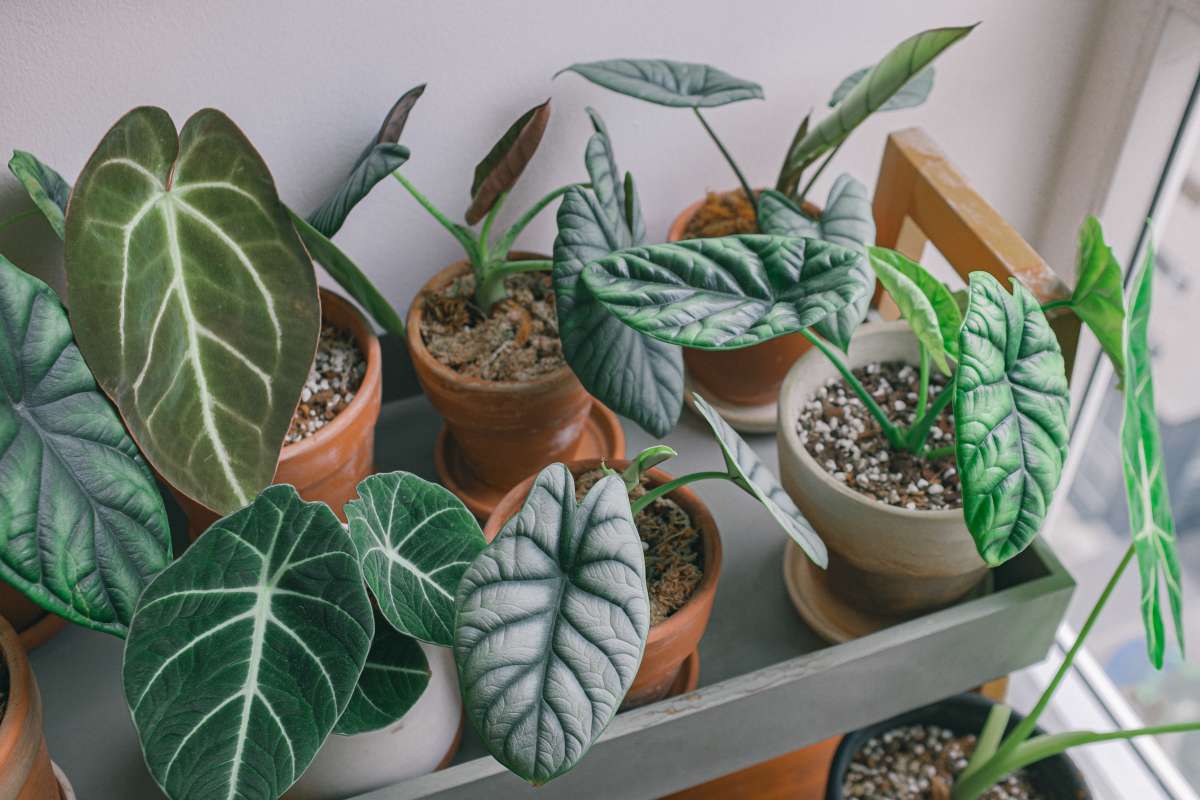
The Alocasia genus consists of 97 species, which are native to the sub- and tropical regions of Asia and Eastern Australia. They all are part of the Araceae family and have pretty much identical care requirements. The plants grow from a rhizome or a tuber and are perennial but can (and most do!) go dormant during the colder seasons. Alocasia are flowering plants but due to them not being very tolerant to environmental stress or care-mishaps, their blooms are rarely seen indoors. The foliage of an Alocasia resembles the shape of an elephant’s ear, hence their name, and their leaves can reach the whooping 20 to 90cm in length!
Alocasia are a top choice for many plant enthusiasts because of their gorgeous and unique foliage. If you have an Elephant Ear at home that too has won your heart, read on to find out how to care for an Alocasia to ensure that the plant-diva will grow and thrive.
This post may contain affiliate links. Read our Privacy Policy and Disclosure here.
How to Care for an Alocasia – Basic Guidelines
The main Alocasia care requirements are summarized in the table below.
Origin: Southeast Asia, Eastern Australia
Common Names: Elephant Ear
Light: bright indirect; won’t tolerate low light spot
Water: moderately
pH: 5.5-6.5
Repot: every 2 to 3 years
Temperature: 18°C to 28°C
Humidity: 45% to 80%
Nutrition: balanced fertilizer (eg: 10-10-10) or 3-1-2 NPK (or similiar); simple NPK fertilizer won’t work so ensure that micro elements are also included
Fertilize: 2 times/year with slow release fertilizer or monthly with liquid one during the growing season; don’t fertilize during winter
Propagation: bulbs, stem division
Pests: spider mites, thrips
Toxic? yes, if ingested
For a detailed guide on how to care for Alocasia plants grown indoors, continue reading.
Alocasia Plant Care: Overview
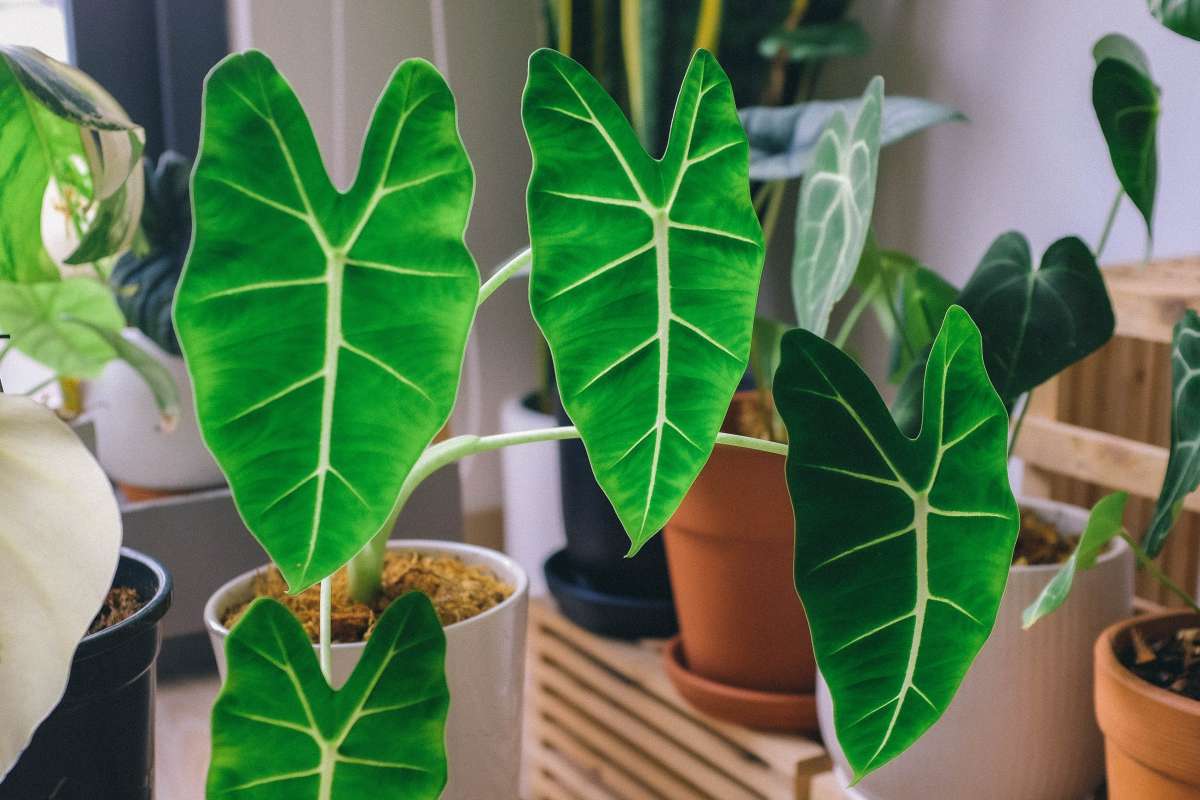
Alocasia are the beautiful divas in the plant world.
If you already have an Alocasia, you probably know it yourself by now – these tropical plants are just so dramatic. If you don’t have an Alocasia yet, then a warning in advance: prepare for leaves dropping! The Elephant Ear is truly a stunning houseplant to have but if the plant’s needs are not met, there is little room for tolerance.
So don’t blame yourself and don’t take it personally if your Alocasia is over-reacting to everything. With time and patience, you will learn to better handle the needs of your Elephant Ear. We hope that this detailed Alocasia care guide will provide you with the necessary knowledge to keep your Alocasia happy, healthy and thriving at home. :)
1. How Much Light Does an Alocasia Need?
The first thing to consider when caring for an Alocasia is to choose a spot that provides the plant with appropriate amoung of light. As I mentioned previously, it is important to stay on top of your Alocasia’s needs and light is a very important factor that can influence the growth and well-being of your plant.
During the growing season (spring and summer), your Alocasia will love all the light it can get. The more light an Alocasia receives – the faster it will grow. It is important to mention here that an Elephant Ear plant will not tolerate a low light location and will quickly show you just how much it dislikes it by dropping a leaf or two (refer to pt. 1). So make sure you have the right spot for your Alocasia that is receiving enough bright, indirect light during the day. At the same time, ensure that your Elephant Ear is shielded from any direct exposure to sunlight (especially during the noon hours) as the foliage of an Alocasia might become scorched by strong rays of direct sunlight.
If you aren’t able to provide a brightly lit location for your Alocasia, consider pampering your Elephant Ear with a grow light which can be especially useful during the winter months (more on that below). Look for a full-spectrum grow light.
How much light (PAR) do Alocasia need? The best PPFD for optimal growth for an Alocasia is: 150-500 umol/m2/s assuming a lighting period of 12-14 hours on a daily basis.
How much lux (foot candles) do Alocasia need? Provide your Alocasia with at least 1000 lux (100 foot candles) to maintain the plant. To ensure better growth, your Alocasia should receive at least 4000 lux (400 foot candles). Bare in mind, however, that the leaves might burn if the light is too harsh and observe how the plant feels at anything above 10, 000 lux (1, 000 foot candles) as this might be too much for your Alocasia. To measure the lux (or the ppfd number) you can use a light meter, also called a lux meter.
Just like Colocasia and Caladiums, it’s quite common for an Alocasia to become dormant during the winter season and to stop growing or go even a step further and drop all of its leaves. This is normal and is not a reason for concern. During this dormant period, your Alocasia will tolerate a location receiving bright or medium light. It’s not advisable to move the plant to a low-light spot to avoid rot-issues setting in. Once the temperatures start increasing and there are more daylight hours again, your Alocasia will start growing once again.
Are you wondering how to find the best spot for your Alocasia at your home? Or what does “medium and low-light” mean? Then make sure to read our detailed Lighting Guide for Houseplants. In it, you will also learn what are the signs that your Alocasia is receiving too little or too much light.
2. When to Water an Alocasia?
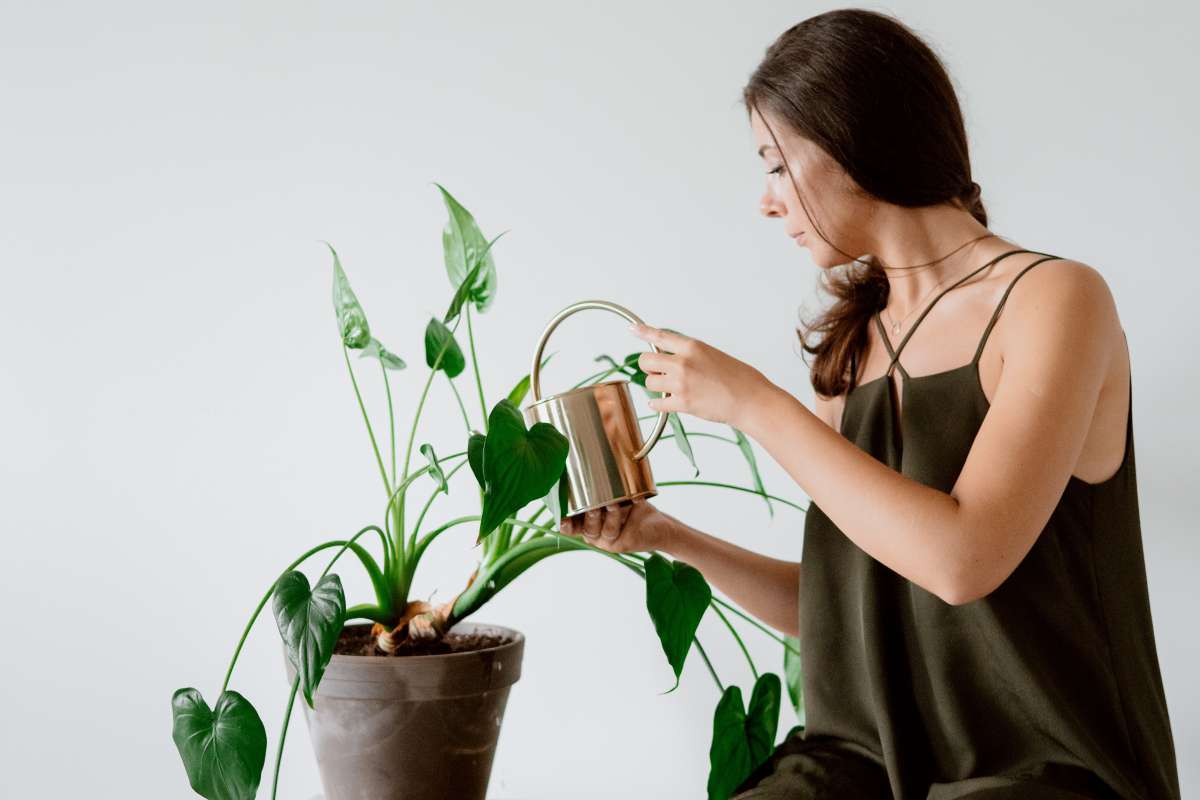
Water is the next main factor to consider when caring for your Alocasia. It’s important to find the golden middle when it comes to watering these aroid plants.
Your Alocasia will not tolerate water stress well, so it is always best to stay on top of your irrigation schedule when it comes to Alocasias grown as houseplants. Make sure to always check the moisture level of the potting medium before watering. You can check the moisture level with a moisture meter or with your finger. Just poke the soil with your index finger at a couple of spots and feel the moisture inside. If it’s still moist – check again in a couple of days, if it feels dry – it’s a good time to water your plant. Whenever watering your Alocasia, ensure all roots are sufficiently moist after irrigation, this means that you should water until water starts dripping in the saucer but make sure to empty the saucer after approximately 20-30 minutes so that the soil will not stay moist for days.
An Alocasia can quickly develop root and stem rot, and fungal infections if it‘s constantly wet. Always make sure that at least the top 2-4cm (0.5-1.5 inches) of the soil are dry before watering it – if the pot is particularly large, you might need to check the soil moisture level even deeper. However, a thing to keep in mind: do not let your Alocasia dry out completely between watering as the leaves can quickly start wilting and drooping. New growth might also become stunted when the plant is not receiving adequate moisture.
If you want to learn more about the best tips and tricks when it comes to watering houseplants, read our guide on watering houseplants the right way. In it, you will also find out what are the signs and symptoms of under- and overwatered plants.
3. What is the Best Potting Mix for an Alocasia Grown Indoors?
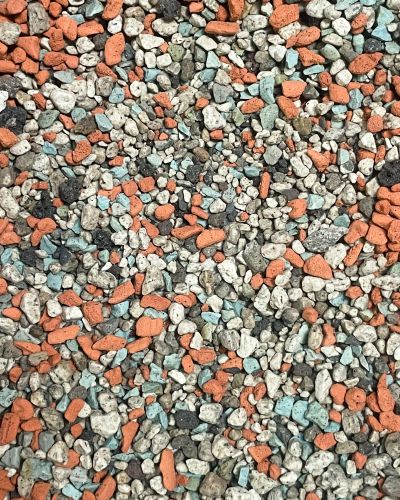
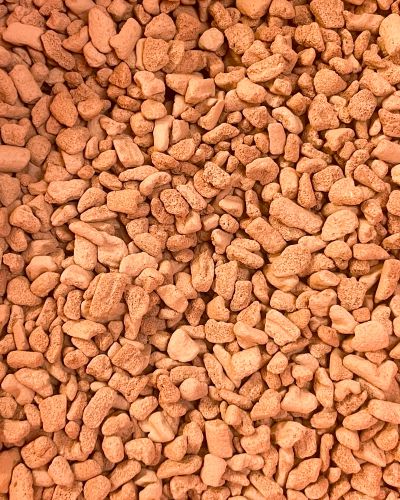
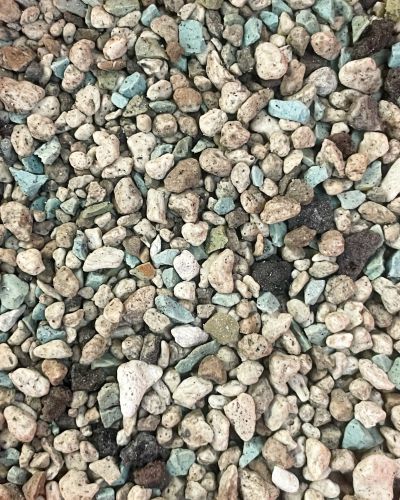
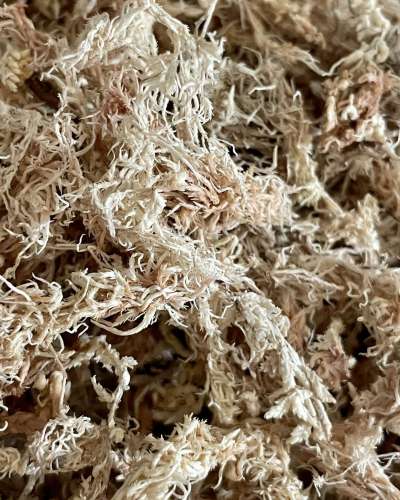
As mentioned above, Alocasias are quite picky and intolerant when it comes to environmental or maintenance-related stress. Thus, it is very important to ensure that your Alocasia is planted in a potting mix that is both well-draining and moisture-retaining. An aroid potting mix, like the one in our shop, works best for Alocasias but if you feel like you want to go with a DIY soil mix, you can plant your Alocasia in approximately equal parts perlite, potting soil, and something chunky – like bark. Generally, plants dry out the fastest at the top of the pot. To ensure that your Alocasia is evenly moist, you could also add some damp sphagnum moss on the top of the potting soil.
Terracotta pots are a great choice as a planter if you have an Alocasia as it allows for air to reach the root system of the plant. However, keep in mind that terracotta pots dry out considerably faster than plastic pots, so make sure to adjust the irrigation schedule of your Alocasia accordingly and not let the plant dry out.
Can you grow Alocasia in hydroponics?
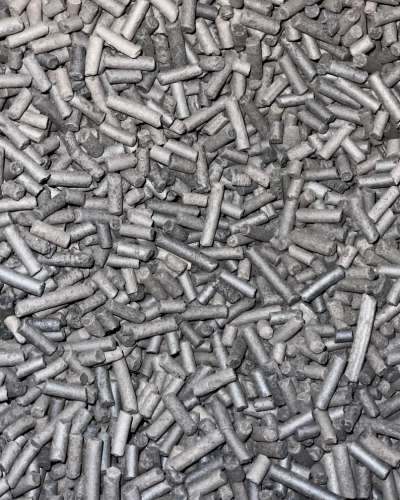
Yes, Alocasias can be successfully grown in hydro or semi-hydro media. LECA is particularly favoured to be used as a semi-hydro media for Alocasia but pon or clay granulate will work well too. If your Alocasia has been growing in soil, make sure that you adequately transition the plant to growing in a semi-hydro environment by checking our guide here.
4. How Much Humidity Does an Alocasia Need?
An Alocasia can be grown without a problem at normal room humidity levels if acclimatized to such an environment. However, they would love higher humidity levels that are mimicking their natural habitat (65%+) and will in turn respond by growing faster and lusher, so consider getting a humidifier to meet their needs. You can use a hygrometer to measure the humidity level in a room.
Make sure that if you are using a humidifier, there is also enough air circulation as stagnant air around any plant can lead to fungal/bacterial issues or the presence of edema upon watering, and some foliage might become damaged. You can use a small fan to increase the air flow around your houseplants.
Although normal room humidity works fine for most Alocasias, they tend to react quite fast to sudden humidity drops. For instance, as heaters are used to warm up a room during the colder, winter months, the humidity can significantly decrease. Thus, make sure that your Alocasia is placed away from any direct exposure to heaters or air-conditioners. There are a couple of tell-tale signs that your Alocasia finds the humidity level around itself too low, such as brown, dry edges on the leaves, and loss of color of the foliage are signs that the humidity is too low. If your Alocasia is experiencing issues due to low humidity and you want the plant to perk up, consider a humidifier.
5. How Often to Fertilize an Alocasia?
Another important factor to consider when it comes to Alocasia care is when, how and what fertilizer to use.
During the growing season from March till October, you should fertilize your Alocasia frequently. The best fertilizer for these aroid plants is one that contains macroelements but also traces of microelements. The microelements are important for the growth and well-being of tropical plants, so don’t choose a simple NPK fertilizer for your Alocasia.
You can use slow-release fertilizer by applying it on top of the soil of your Alocasia’s spot at the beginning of March and then re-applying it as indicated. If you opt-in for using liquid fertilizer for your Elephant Ear, you will need to use it more frequently. Liquid fertilizers should always be used as directed and the maximum dose should never be exceeded. It is also important to first give your Alocasia pure water and then water containing liquid fertilizer.
Alocasias can suffer from fertilizer burn quite fast, so I prefer the “weakly weekly” fertilization method for them. This method is as follows: give between 10-25% of the fertilizer’s recommended dose to your Alocasia every week during the growing season. Once a month flush the soil by watering your Elephant Ear with fresh water that contains no fertilizer.
Alternatively, if the “weakly weekly” method is not your thing, you can fertilize your Alocasia every second to the third week during the growing season. But I would suggest always starting low and build-up the strength of the fertilizer gradually.
If you are using liquid fertilizer and for optimal nutrient absorption, ensure that the pH of the water is between 5.8 and 6.2. You can measure the pH value using a pH meter and do so after adding the fertilizer to the water.
Since the majority of Alocasias become dormant during winter, as soon as your plant stops growing, you should refrain from fertilizing it at all.
6. The Best Temperature Ranges for an Alocasia
Alocasias, being tropical plants, will not tolerate freezing temperatures. They stop growing at temperatures below 10°C (50°F) and might experience foliage damage caused by cold, so if your plant has been happily growing outdoors during the warmer months, make sure to bring your Alocasia indoors when the weather gets chilly. Alocasia plants are not frost-resistant!
The temperature tollerance range of Alocasia is quite wide: 12°C to 36°C (53.6°F to 96.8°F ). However, your Alocasia will thrive and grow at its best when the temperatures in the room (location) where the plant is are between 18°C and 28°C (65°F to 85°F).
7. How to Replant (Repot) an Alocasia
How often do you need to repot an Alocasia? As a general rule, Elephant Ears need to be repotted every 2 to 3 years but this of course depends on how fast your Alocasia grows. Before attempting to give your aroid plant a new pot, ensure that it will benefit from it. Alocasias don’t take being replanted so lightly and the whole event is stressful for them, so prepare yourself in advance that some leaves much wilt and die.
Sometimes, plants outgrow their pots much faster than anticipated. What are the signs that your Alocasia might be root-bound? If you are wondering how to pinpoint that your Elephant Ear has outgrown its pot without actually uprooting the plant, then check out our detailed guide on Signs That a Plant is Root-bound.
Unless it is an emergency, like root or stem rot, you should aim to repot your Alocasia only during the growing season because as mentioned previously, these plants tend to go dormant during the winter times. If you repot your Alocasia during the colder months, the plant might react negatively to it and might fail to acclimatize to its new pot.
When you are attempting to replant your Elephant Ear, be as gentle as possible with the root system as ripping off any roots will stress the plant. As a rule: it’s always better to have some old soil inside than to damage the root system of the plant.
Don’t choose a pot that is too big for your Elephant Ear as this might prompt the development of rot-related issues. Your plant’s new pot should be maximum 2 sizes bigger than the previous one. Ideally, you would choose an aroid potting mix when replanting your Alocasia as these tropical plants need to be grown in a medium that at the same time provides their roots with enough moisture and oxygen.
After you have taken your Alocasia out of its old pot and removed as much dirt as possible from the roots, it’s time to prepare the plant’s new home. Simply fill 1/3 of the new pot with fresh aroid potting mix, then insert your Alocasia inside and top up with additional soil as needed. Make sure to water thoroughly the media after planting your Elephant’s Ear. Next on, place your Alocasia in a location with bright indirect light but make sure to avoid any harsh sun rays.
Tip: If your plant has just arrived in the mail, allow it to rest and recover for at least 2 weeks before repotting it.
Are you looking for a step-by-step guide on how to repot your Alocasia hassle-free? If so, we have just the thing for you: our article on Repotting Houseplants Made Easy.
8. How to Propagate an Alocasia
If you are staying on top of your Alocasia’s care requirements, at one point you might find this tropical plant has outgrown its spot and you might decide to cut it back a bit and propagate it. If so, go you!
As mentioned, Alocasia become dormant during the winter months, so if you have decided to propagate your Elephant Ear, the best time would be to do it when the plant is no longer dormant, in other words: wait until spring at least.
As houseplants, Alocasia are most commonly propagated through division and bulbs. Seed propagation of Alocasia is rare as they take at least 3 years to flower.
We have a very detailed step-by-step guide on how to propagate plants through division, your Alocasia included. Read our Propagation Through Division article.
In short, to propagate your Alocasia you need to do as follows. The first step to propagating your Elephant Ear is to remove the plant from its pot. Be very gentle with the roots, you can tap the pot on the sides to be able to get out the root ball with ease. Next on, you need to locate sections on the stem of your Alocasia that have about 2-3 leaves with roots. Using a disinfected, sharp tool (a 70% alcohol works great), separate the stem in the above-mentioned sections. Before planting your new Elephant Ear babies allow for the cut places to form callus by air-drying them. Make sure that you plant your new plants in an aroid potting mix and provide them with a brightly lit location without direct exposure to sunlight.
What if there are no leaves?
If the rhizome of your Alocasia has lost its leaves, you can still propagate it if that portion of the stem has nodes. They look like little elevated dots on the stem. Follow the above-mentioned steps and ensure that when you are potting the stem, the upper part where the first node is, is staying above ground. Surely, in no time, you will see a new leaf coming from there. Woohoo!
Can you propagate Alocasia from a bulb?
If you are repotting your Alocasia, you might find in the soil (sometimes attached to the roots), little round-shaped bulbs. They could be also just rolling around the soil and not being attached to anything. Usually, bulbs that are free-floaters have a low chance of growing a new plant (they are possibly dead) but regardless, give them a go! They might surprise you. Let’s look at how you can propagate an Alocasia from a bulb.
So you found an Alocasia bulb, now what? Gently squeeze the bulbs that you have found. If they are soft, they are probably too far gone and you should dispose of them. If the bulbs are hard, there is a good chance that a new plant will sprout out of them. You can plant your Alocasia bulb directly in a well-draining soil mix. Keep them warm, in a bright and humid location, and never let them completely dry but also do not soak them. If the humidity at your home is running on the lower end, you can plant them in a transparent jar and close the lid. Make sure to open the jar regularly (aka each day would be great) to allow fresh air to come in. Under proper conditions, your Alocasia bulb might take 2-6 weeks before you see a new plantie sprouting. So be patient and enjoy it until that precious new life comes out. :)
9. Alocasia Plants Tend to Go Dormant
Alocasias might drop all of their leaves. Aka the drama queens.
Alocasias are amazing but especially during the Winter months, literally, all of the plant’s leaves might fall off. This is usually not a cause for concern and sooner or later, new growth should start showing up as the spring comes closer. Why do the Alocasia leaves fall off? Stress. Unfortunately, this gorgeous plant is easy to get stressed. However, like a phoenix that can rise from the ashes, your Alocasia that has just lost its leaves, might at one point come back to life, so do not give up on the plant just yet! Ensure that the stem is in a warm and bright location and ensure that it is receiving just the right amount of water (not too little and not too much). In other words, even if your Alocasia has lost all of its leaves, continue taking care of the stem and wait for new growth.
10. Rotating Your Alocasia Ensures Proportionate Growth
Your Alocasia will always turn itself in the direction where the light is coming from, so make sure that you periodically rotate the plant, to ensure that all the leaves are getting a good amount of light and thus, encourage your Alocasia to grow proportionally on all sides. Alocasias are also notorious for dropping leaves that are not receiving adequate light, which is another good argument to consider rotating your plant every couple of days or so.
11. Clean Your Alocasia’s Leaves Regularly
An important part of an Alocasia care regime is to ensure that the plant’s leaves are clean. The Elephant Ear plants have stunning foliage that, however, is known to collect dust quite easily. Dusty leaves can encourage a pest infestation, prevent the plant from photosynthesizing fully, and limit transpiration. Thus, dust can negatively affect the health of your Alocasia. That’s why, whenever you see that the leaves of your aroid plant are getting dirty and losing their shine, it’s time for some bath time.
If your Alocasia is small enough, you can transport it and wash gently the leaves under a kitchen sink or in a bathtub. Ensure, however, that the plant is not getting drowned by water so avoid water falling on the soil itself.
Alternatively, if you are the proud parent of a giant Alocasia, regular bathroom showers are perhaps not an option. In this case, using a clean, soft towel and rain or distilled water, will do the trick and aid you in cleaning your Elephant Ear leaves. Simply spray the leaves with the water and then wipe them off gently with the towel. You can use your second hand to support the leaf from the opposite side so that it won’t break while you’re cleaning it. Ensure to clean both the upper and the lower surfaces of your Alocasia’s leaves.
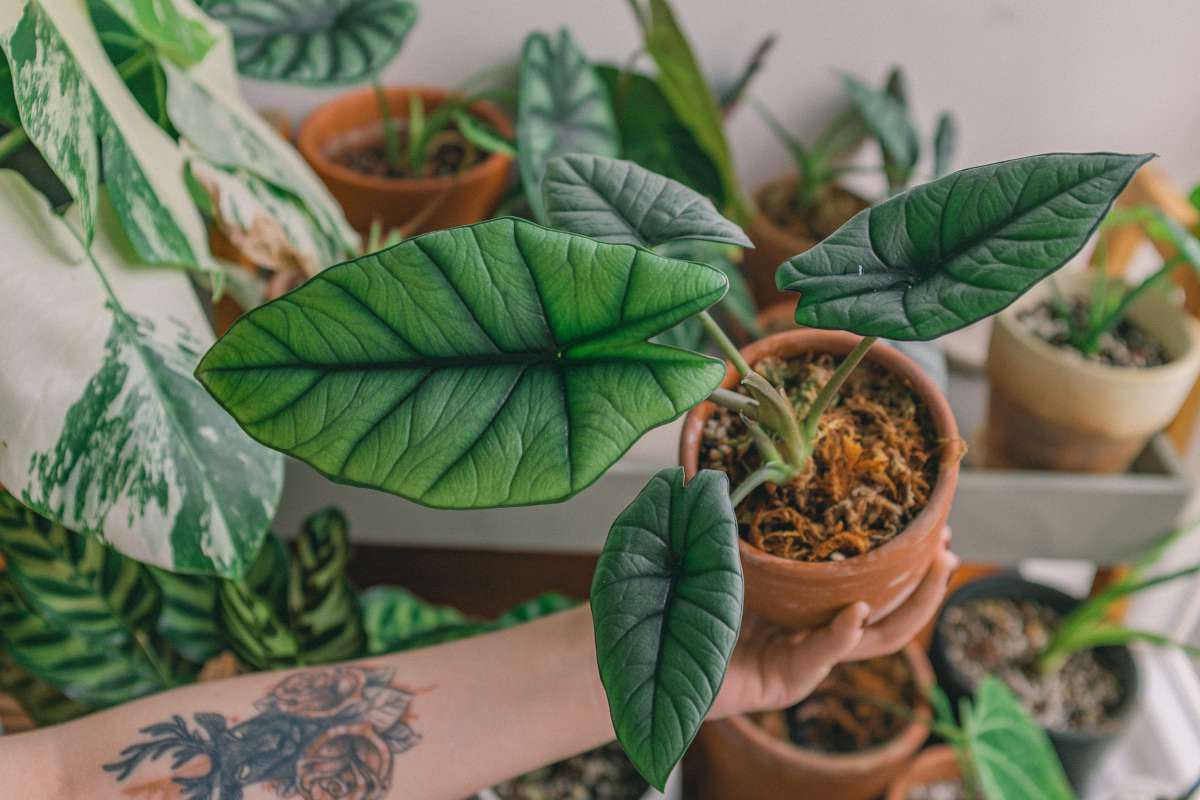
12. Variegated Alocasia Plants
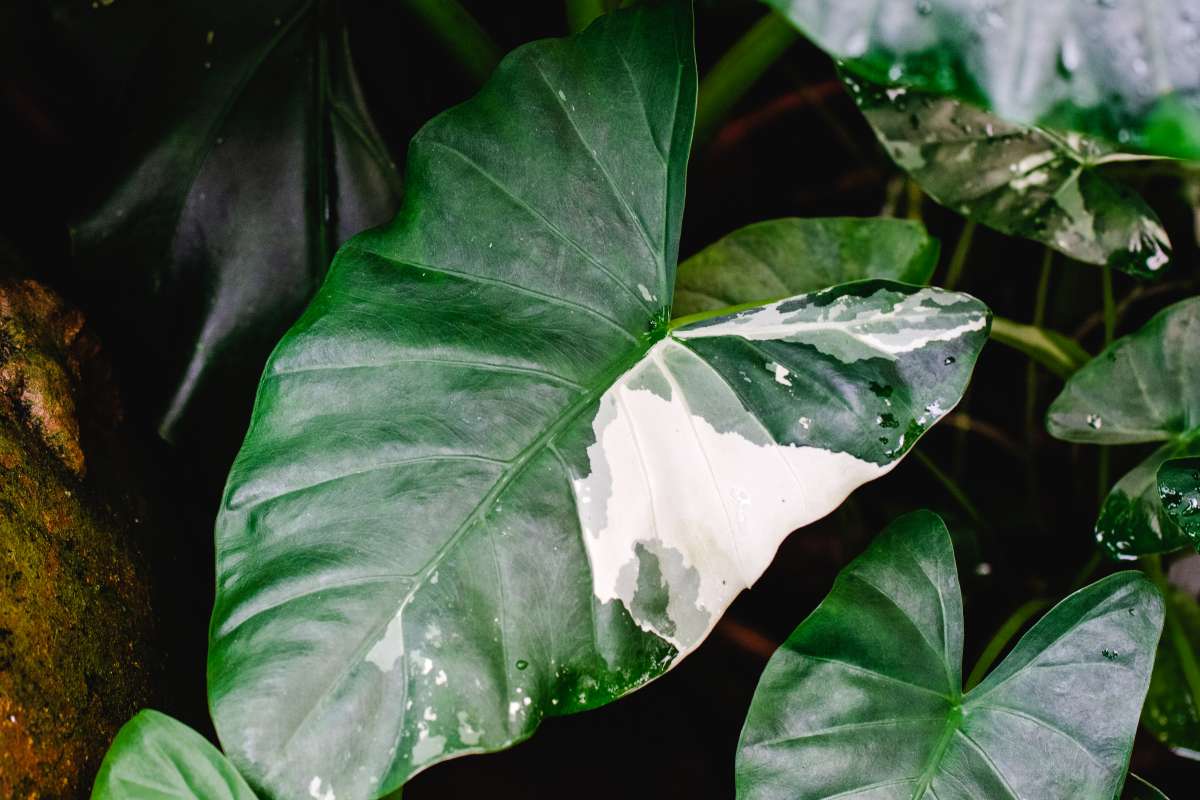
Many beautiful Alocasia species are sought after their unique variegation, for example, the Alocasia Macchorhizo Variegata.
Alocasias are already quite dramatic plants and their variegated representatives are even more so. So if you have a variegated Alocasia, you would need to ensure that you are staying on top of your plant’s needs to avoid any browning variegated parts. As a general rule: your variegated Alocasia would require more light than a green one.
If your variegated Alocasia develops brown spots on the leaves, some tell-tale signs might indicate where the problem lies. For example, if the spots are appearing crispy and lightly browned, and your plant looks droopy, it could be an issue with low humidity or too infrequent watering. If, on the other hand, the spots are dark and appear soaky, it could be an over-watering issue.
13. How to Identify & Treat Pests on an Alocasia
Although rarely, spider mites and thrips seem to be particularly attracted to Alocasias. Spider mites and thrips are a nuisance to deal with but if they are caught on early, you would be able to easily save your Elephant Ear from pests. Thus, a good habit for any plant parent to develop is to check your plant once a week throughout for any signs of unwanted visitors.
Is your Alocasia looking sad and wilting and you have already excluded every possible environmental factor? Then pests could be the reason why your Alocasia is not feeling so well. The most common pests that are plaguing Alocasias grown indoors are spider mites and thrips.
The damage from both above mentioned pests commonly appears on the underside of the Elephant’s Ear leaves. If you find that your Alocasia is indeed, plagued by an infestation, your first step should be to inspect nearby plants and isolate all affected ones. Next on, try to use a gentle, natural insecticide like neem oil or home-made insecticidal soap. Make sure to cover the entire plant’s leaves, especially the undersides, and repeat as necessary.
If you suspect a pest infestation, make sure to read our detailed guide where we discuss how to identify pests on houseplants and how to get rid of them for good.
14. Alocasia Care: Common Plant Issues
You will notice straight away if something is wrong with your Alocasia, these plants are not known to act tough, like a Monstera would, for example.
If there is only one yellowing and droopy leaf on your Alocasia and the plant looks generally healthy and happy, then it is probably not a cause for concern, as it is normal for older leaves to die off at some point. But if you start noticing that your plant is developing spots or losing vigor, then there might be something concerning going on with your Elephant Ear.
In most cases, your Alocasia’s leaves will turn yellow if there is something off in the care routine of the plant. And as such, once the plant’s requirements are met, it will bounce back fairly quickly.
Here is a detailed guide on how to identify the cause of why your Alocasia’s leaves are turning yellow and how to fix the problem.
Stem and root rot are usually one of the main reasons behind an Alocasia wilting. Both are caused by either the plant receiving too frequent water, or other factors that aren’t allowing the potting media to dry-out sufficiently fast and instead, stays constantly soggy and wet. These include: insufficient light, potting soil that is too compact (i.e. doesn’t have enough drainage), high humidity without sufficient air flow, cold temperatures, and others.
Stem and root rot can quickly result in a plant’s death if not treated appropriately but even though this sounds quite dramatic, there is a bright side to the story too: stem rot and root rot can be managed and treated effectively if the problem has been caught early on. Therefore, if your Alocasia is dealing with a rot-related problem, you need to act immediately to save your beloved Elephant Ear.
What are the signs that an Alocasia has stem / root rot? In our detailed article about how to identify and treat rot in plants, we have all the information that you might need to prevent, spot and treat rotting issues on your Elephant Ear.
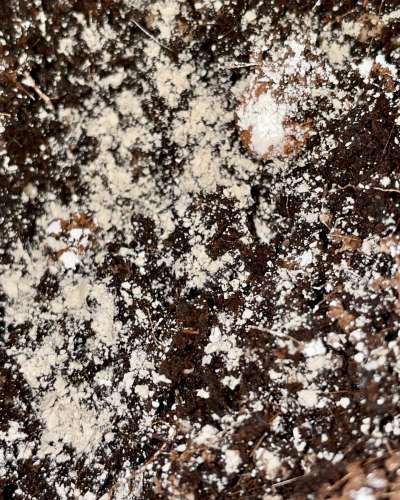
Bacterial and fungal diseases come second in terms of causing a plant’s leaves to turn yellow but they can’t be excluded. Most plant diseases are transmitted from a plant to a plant or are caused by an environment that favors the development of fungus. For example, if the conditions around your Alocasia are cold and wet without sufficient airflow, rust and mildew fungus might set in. This is the main reason why I don’t favor misting houseplants as it might promote such growth.
Usually, fungus appears on leaves as extra growth and once it reaches maturity, spores can be seen on the plant’s leaves. The spores are very lightweight and can travel great distances through airflow. Bacterial infections appear as water-soaked lesions on the leaves. If you suspect that your Alocasia might become the victim of bacterial or fungal disease, you need to isolate the plant from the rest of your collection immediately and apply an appropriate fungicide. In some cases, especially if the disease is bacterial, it might be best to cut off the entire foliage of your Elephant Ear and allow the bulb to produce new growth.
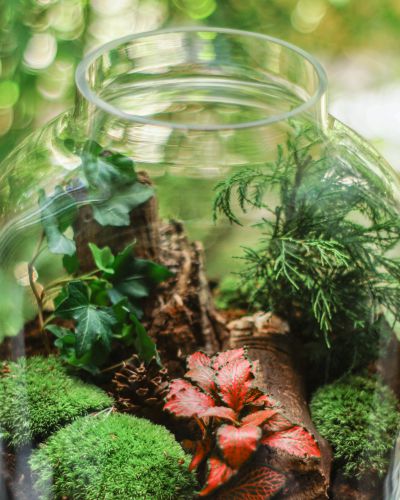
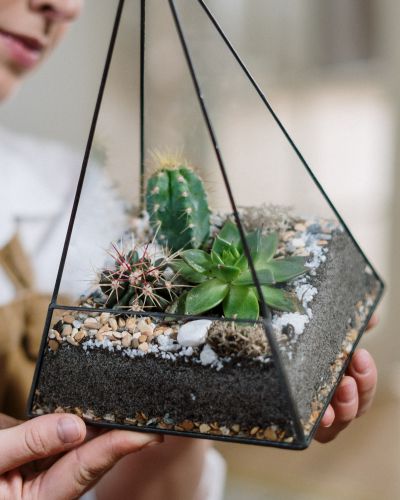
15. Can Alocasia be Grown in a Terrarium?
Growing tropical houseplants in an enclosed environment, i.e. a terrarium has been gaining quite a lot of popularity recently. Although, it is possible to grow an Alocasia in a terrarium, it is not advisable. The Elephant Ear plant grows moderately fast but each leaf grows quite tall and away from the rhizome. Thus, unless you have a really large terrarium, your Alocasia will outgrow it in no time and will look like a flower in a vase. Of course, if that is the look you are after, then by all means, go ahead. If you want to give this challenge a go, we have a terrarium DIY set at our shop that includes the substrates needed for your Alocasia-adventure.
However, unlike others – for example, Succulents & Cacti, our opinion is that Alocasia are plants that are not ideally suited to be grown in a terrarium.
Are you wondering how to successfully build a plant terrarium for your Alocasia? Then check out our step-by-step guide on building a terrarium for plants.
16. Are Alocasia Toxic?
Are you wondering if Alocasia are pet-friendly or if they are toxic for cats, dogs, and babies alike? Alocasias, just like other Araceae family members, are poisonous if ingested for all mammals. Unfortunately, all parts of your stunning Elephant Ear are dangerous as they contain insoluble calcium oxalate crystals that can cause nausea, vomiting, irritation, and burning of the mouth, tongue, and esophagus. In rare cases, swelling of the eyes has also been observed.
That is why ensure that your Alocasia is placed in a location where your furry family members and children can’t reach it.
Alocasia Care: Final Thoughts
In this Alocasia care guide, all the requirements that an Alocasia, grown as a houseplant, would have to thrive were covered. Elephant Ear are not really beginner-friendly houseplants but once you manage to get the hang of them, their care routine and maintenance will be a piece of cake.
Mastering the basics of Alocasia care are key to ensuring a healthy and happy plant. Alocasias need to be placed in a location that receives bright, indirect light, as they will not tolerate a shadow spot. Their potting mix should be loose but water-retaining and during the growing season, they need to be irrigated moderately but regularly. Your Alocasia might go dormant in Winter – so don’t panic, once the Spring sun starts shining, your Elephant Ear will come back to life.